Mip Level Dithering
Mip Mapping introduces a new annoying artifact: Where the hardware swaps from one level to another, you usually notice a discontinuity in the texture. You can notice the swap from a sharp to a more blurry level. This swap discontinuity can be hidden using two techniques: trilinear filtering and Mip Map Dithering. Tri-Linear filtering is the best method, but is rather expensive since more texture information has to be fetched (8 texels to be correct – also trilinear filtering would require 2X multi texturing if application does single texturing, and 4X multi texturing if application does 2X multi texturing). Mip Map Dithering, on the other hand, has roughly the same cost as normal Mip Mapped rendering but it uses a dither trick to hide the sudden swap from sharp to blur. The basic idea behind Mip Map Dithering is that instead of changing from the high level to the lower level in one go you do it gradually. This is done by adding a random value to the Mip Level selector, as a result you will swap between the level for a while (jumping over the limit and back) rather than one move over the change value. While Mip Map dithering successfully hides the sudden change it also results in more blurry graphics. Some people consider Mip Map dithering “cheatingâ€, but remember - it does not require you to perform double texture passes for each pixel. The images below illustrate this:
Mip-Map Dithering Off

Mip-Map Dithering On

Anti-aliasing quality demonstrated…
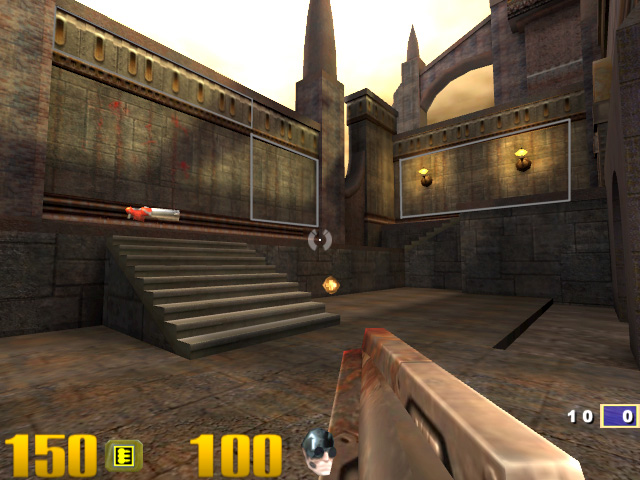
I noticed that many people still doubt the true use of Anti-Aliasing. Aliasing introduces jaggies, flickering lines, crawling jaggies and pixel popping. These effects are usually not visible in static screenshots. MPEG and AVI files are not very good to show the effect either due to compression artifacts. The best illustration I could find is a little program written by Soós Ãrpád. It takes a high-resolution non-AA-ed image as input and you can then select various AA-methods and see the result. The most interesting feature of the program is that you can make the image move and zoom. These options allow you to see effects like crawling edges and they confirm that motion is needed to see how bad aliasing really is. Also included is a blur option. You’ll immediately see that Anti-aliasing is very different from simple blurring. I suggest you download this little demo program and play around with it. Don’t forget to use the move and zoom option since they show just how bad aliasing is. Included are both a demo scene and a high-resolution Quake3Arena screenshot. You can use your own images with the program. Download it here. (New version adding extra AA methods and options including the 2.25x method - 1.5 oversampling in X and Y direction - implemented in the NVIDIA drivers, also includes 2 special test images for moire patterns - Updated 16/05/2000).
To those of you that are pretty much convinced that FSAA won't matter or be appreciated in a fast-paced First-Person-Shooter game like Quake III Arena or Unreal Tournament, Reverend has made some Java applets that somehow may change your minds. These AVIs will show you the difference FSAA makes in Quake3. I recommend that you at least check it out.
Conclusion
Image quality comparisons are very tricky. The best way to compare any sort of image quality is to build two identical systems (at least two identical monitors) with only the video card differing. Then, set them up next to each other and just compare left with right while running a demo. The problem is that such a test setup is very difficult to achieve. Beyond3D has tried such a set-up and found that the 3dfx V5500 was delivering better FSAA image quality than the GeForce1 board used for comparison. We do need to stress that this was not a blind test and that image quality is a personal thing. In other words, you might not like what we like. The point is, the only way to truly appreciate and understand AA is to experience it first hand… see and believe. We will try to get you more screenshots taken using the correct procedure on the V5500, but static shots really don’t do the hardware justice.
Many thanks go to Reverend for his help with this article, especially for making the AVI's demonstrating FSAA and providing all the images (save for the GeForce ones).
For more discussion on this topic, head over to this thread on the boards.