NVIDIA PerfHUD Basics
Before we take a look at how we found it to use, here's a quick introduction to how it works for the uninitiated. PerfHUD centers around an instrumented display driver that knows how to query the GPU in order to provide signalling and state information so that you can see how it's working as things execute.
You hook into the display driver by asking, in your application, for a specific instance of a certain Direct3D device context when you initiate the basics of 3D rendering in your app. The display driver in collusion with PerfHUD then know you're asking for support, and PerfHUD kicks into life.
Because of what sits between your application and the 3D API -- the display driver -- PerfHUD can work its magic by working with the driver to intercept, watch and passthrough what your application is asking for from the 3D API. That's the crux of how it works, because NVIDIA own the right parts of the stack.
PerfHUD manifests itself as a semi-transparent application overlay, putting the information and controls you need right there on top of your application's rendering. The PerfHUD UI sports the basic windowing widgets and control you're likely to know and love (or hate!), so manipulating the UI is a matter of keyboard and mouse control in the right places. As a key design goal, the drawn graphs and widgets are lightweight so that PerfHUD's contribution to rendering load doesn't impact or interfere with your application's in a significant way.
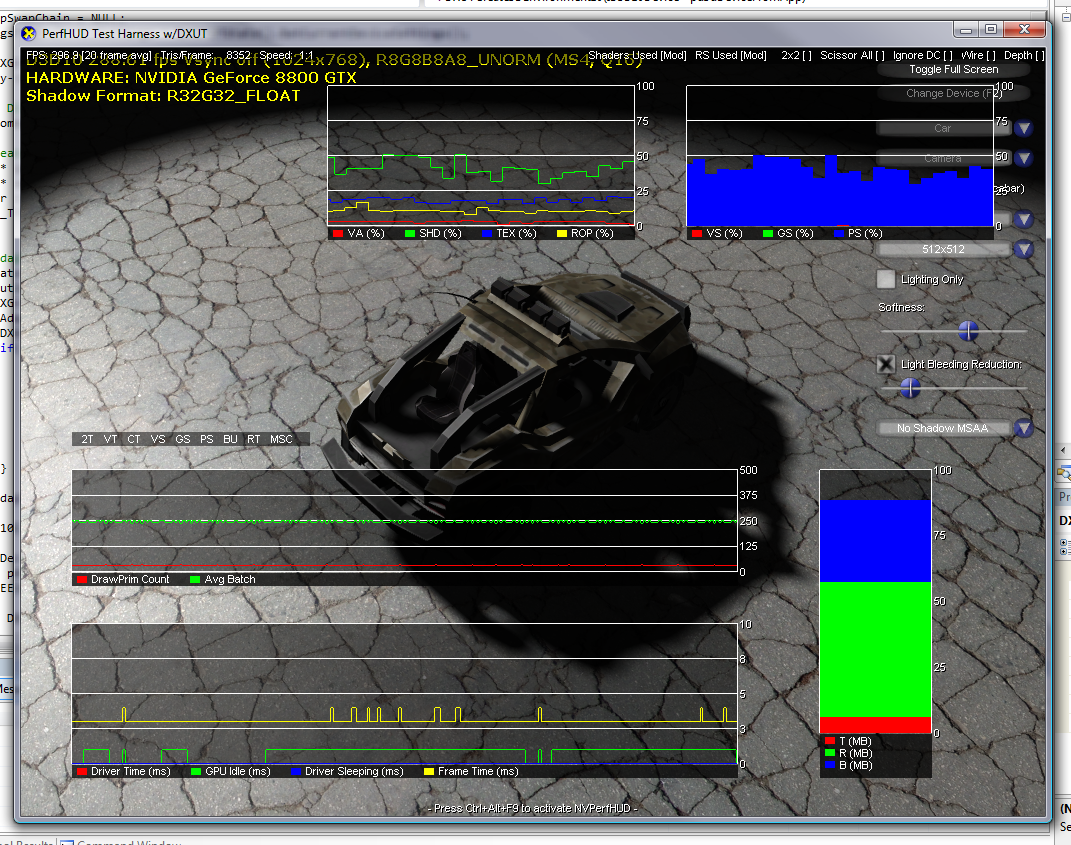
The image above gives you the at-a-glance gist. As mentioned, PerfHUD overlays its information on top of the rendering being performed by your application. It's resolution aware, so it'll move its overlay objects to help optimise the number of useful non-overlaid pixels you can see, to make the objects it draws useful conduits for the information they want to convey.